
Why installation quality matters just as much as the film itself.
Not all paint protection film installations are created equal.
Two vehicles can leave different shops wearing the same high-quality PPF, yet the finished results can look dramatically different. The reason is simple: the film itself is only part of the equation. Installation quality matters.
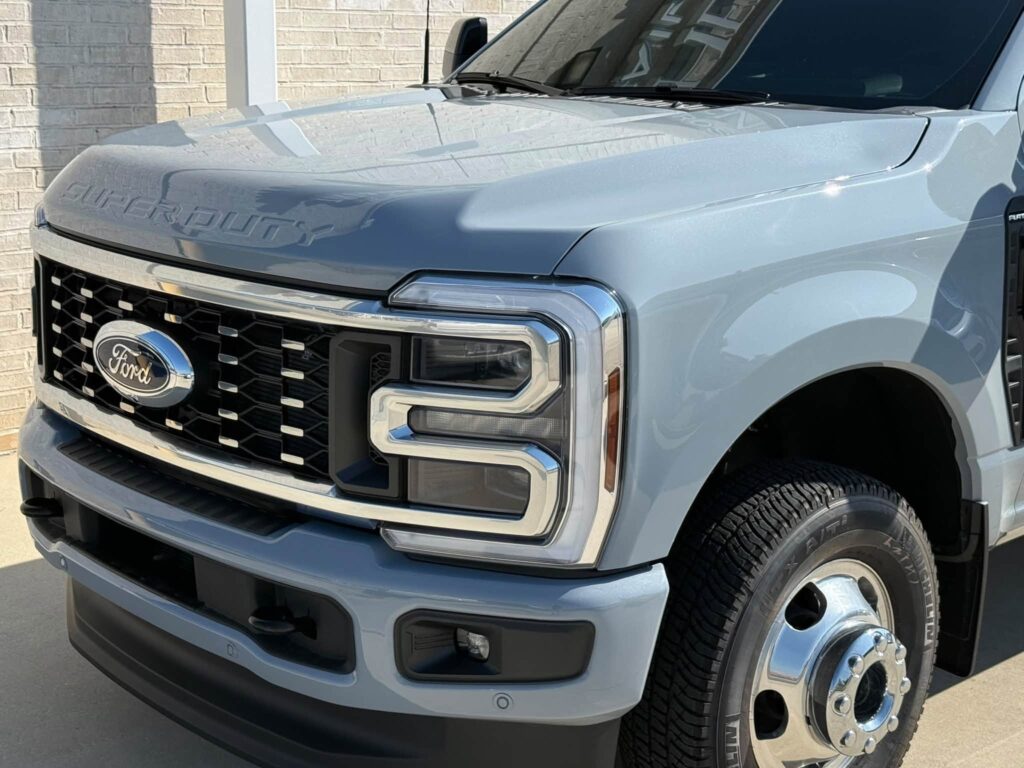
We recently completed a full front cap PPF installation on a brand-new 2026 Ford F-350 Platinum at Southern Tint & Detail Pros. With a truck like this, our goal wasn’t simply to get film onto the painted surfaces. We wanted maximum practical coverage while making the finished installation as seamless and difficult to detect as possible.
Achieving that required proper preparation, strategic disassembly, a combination of modified patterns and bulk installation techniques, careful edge and corner work, and attention to details that can easily be overlooked during a faster installation.
Here’s what goes into doing PPF the right way.
Why PPF Installation Quality Matters
Paint protection film is designed to create a sacrificial barrier between your vehicle’s paint and the abuse it encounters on the road.
On the front of a vehicle, that can mean protection from rock chips, road debris, bug impacts, minor scratches, and other damage that would otherwise reach the painted surface.
But installing PPF isn’t simply a matter of laying a sheet of film over a body panel.
Look closely at a lower-quality installation and you may find visible film edges, unnecessary seams, contamination underneath the film, adhesive lines, poorly finished corners, trapped moisture, or areas where the installer stopped coverage short because the pattern was easier to install that way.
A quality installation should be the opposite.
Our goal is for you to notice the truck—not the PPF protecting it.
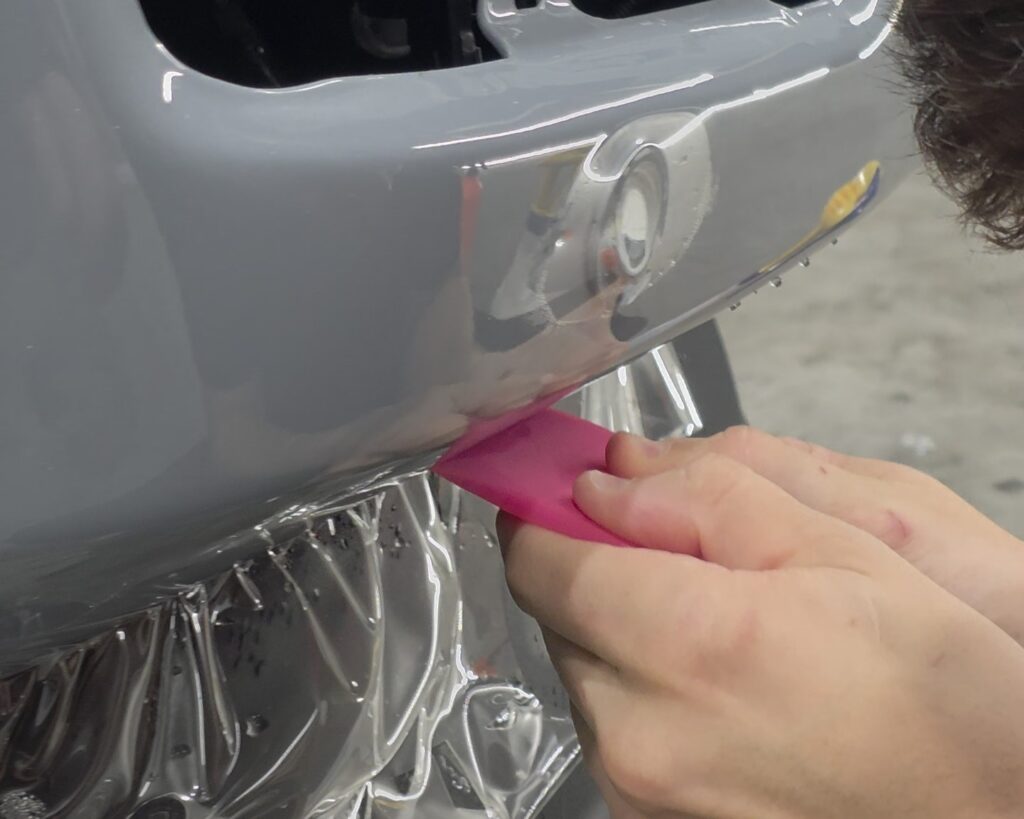
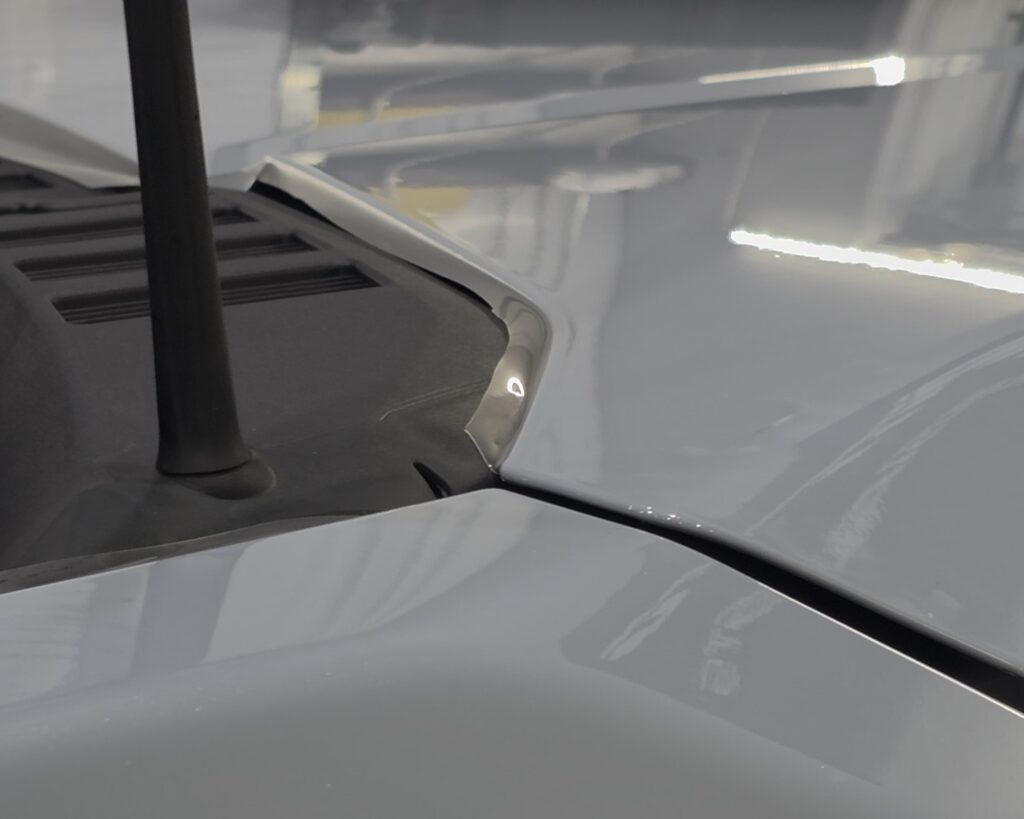
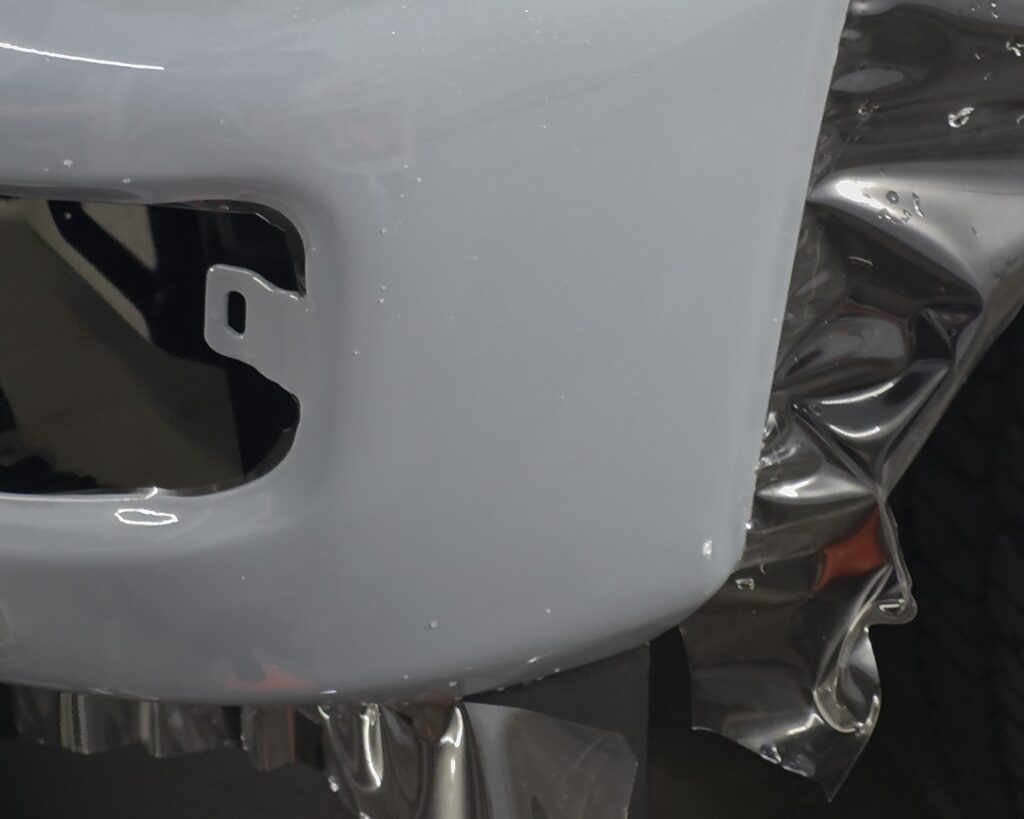
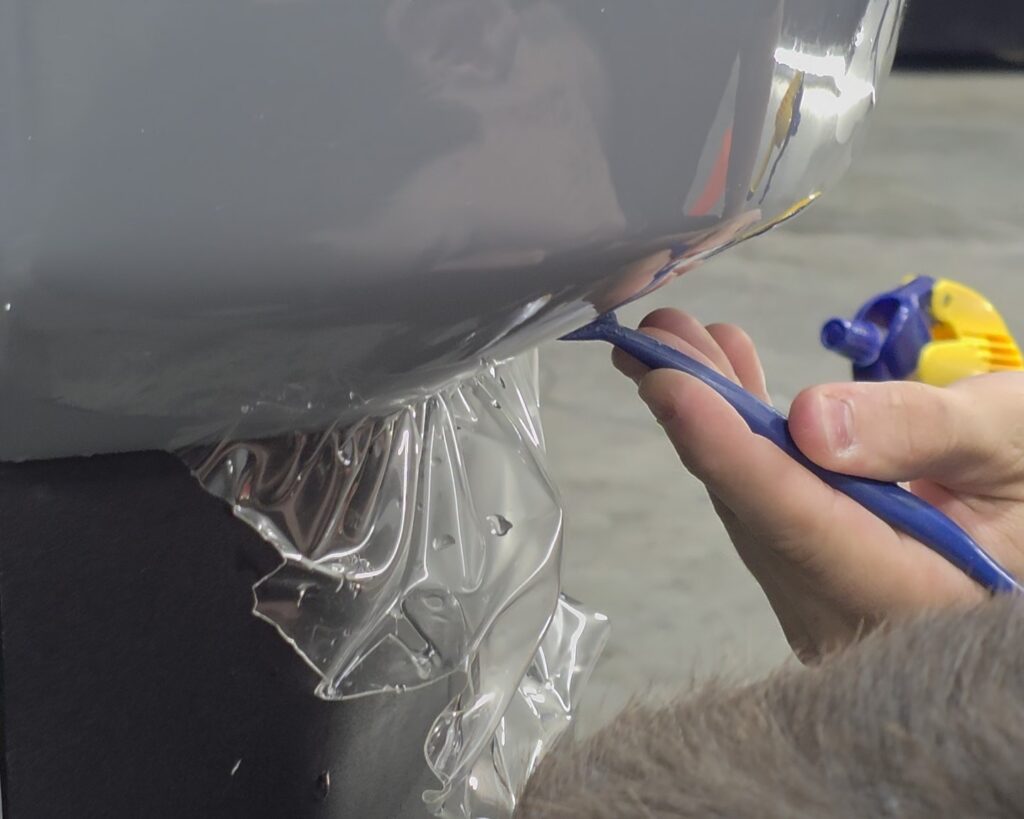
A Full Front PPF Installation on This 2026 Ford F-350 Platinum
For this F-350 Platinum, we installed PPF across the truck’s front cap, where the paint is subjected to some of the greatest exposure to road debris.
The size and design of the Super Duty present some interesting challenges. The front end incorporates numerous edges, openings, trim pieces, contours, and recessed details.
Instead of treating those obstacles as places to simply stop the film, we approached the installation with the goal of creating clean transitions and maximizing coverage wherever practical.
That started before the film was ever installed.
Proper Disassembly Creates Cleaner PPF Coverage
One of the most noticeable differences between PPF installations is what happens around trim pieces.
For this F-350, fender vents, fog lights, and other appropriate trim components were removed during the installation.
Why go through the additional work?
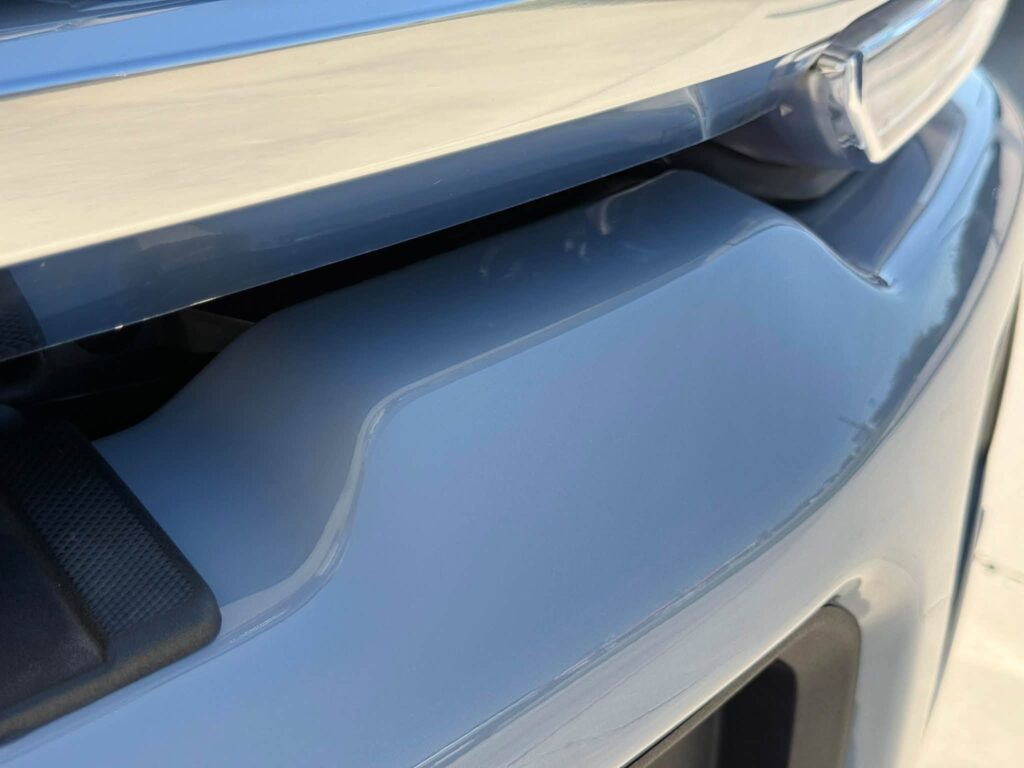
Removing certain components allows us to extend and tuck the film into areas that would otherwise require an exposed edge or cut line around the component.
A simpler installation may use a precut pattern that follows the visible perimeter of a piece of trim. That can protect the main surface of the panel, but it may also leave the edge of the PPF visible.
When appropriate components can be safely removed, we can install the film beneath their boundaries and reinstall the components afterward.
The result is a much more integrated appearance.
It takes additional time, but PPF is supposed to protect the vehicle without constantly reminding you that it’s there.
Modified Hybrid Patterns and Bulk PPF Installation

Precut PPF patterns are extremely useful, but that doesn’t mean the factory pattern should dictate every installation.
On this F-350, we used a combination of modified hybrid patterns and bulk installation to achieve the coverage and finish we wanted.
A standard precut pattern is designed to fit a particular panel within predetermined boundaries. That can make installation efficient, but the standard pattern isn’t necessarily optimized for maximum wrapping, tucking, or customization.
Modified patterns allow us to extend film beyond certain standard pattern boundaries when appropriate. That extra material can then be carefully worked around an edge or tucked into an adjoining area.
Bulk installation takes customization even further. Rather than relying entirely on a predetermined pattern, the installer works with a larger section of material and conforms it to the panel.
The appropriate method depends on the panel, its geometry, and the result we’re trying to achieve.
For this F-350, using both approaches allowed us to prioritize the finished installation rather than simply choosing whichever method was fastest.
No Cutouts Around the Indented SUPER DUTY Hood Lettering
The hood of the 2026 F-350 provides a perfect example of why installation technique matters.
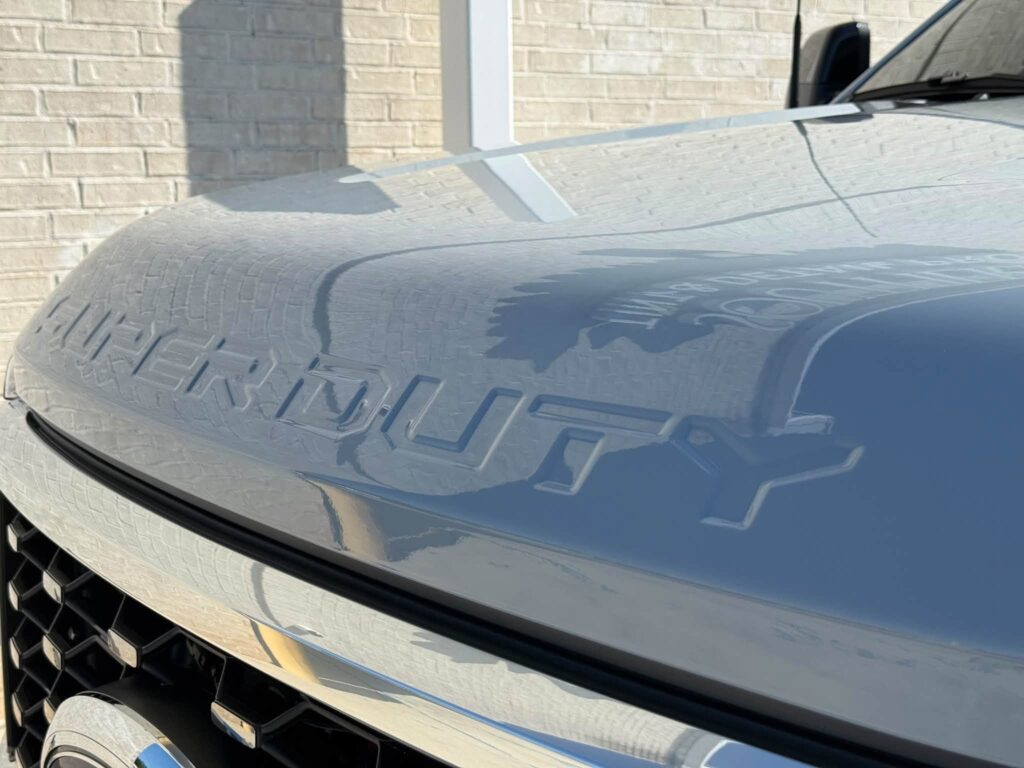
The hood features the distinctive indented SUPER DUTY lettering stamped into the surface.
One way of dealing with complex recessed areas is to create cutouts that allow the film to go around them.
We didn’t do that.
The PPF was installed continuously across the hood and carefully laid into the recessed SUPER DUTY lettering without individual cutouts around the letters.
This maintains continuous coverage and avoids introducing a collection of additional film edges around one of the hood’s most recognizable design elements.
The challenge is getting the film to conform correctly to those recesses.
The film needs to be properly positioned and worked into the contours without leaving trapped air or moisture behind. When completed correctly, the film follows the shape of the hood—including the recessed lettering—while maintaining a clean appearance.
On the finished F-350, there were no leftover air or moisture bubbles trapped inside those recesses.
It’s a small detail from a distance. Up close, it’s exactly the type of detail that separates an average PPF installation from an excellent one.
Wrapped Edges and Properly Finished Corners
Edges are another area where installation quality becomes apparent.
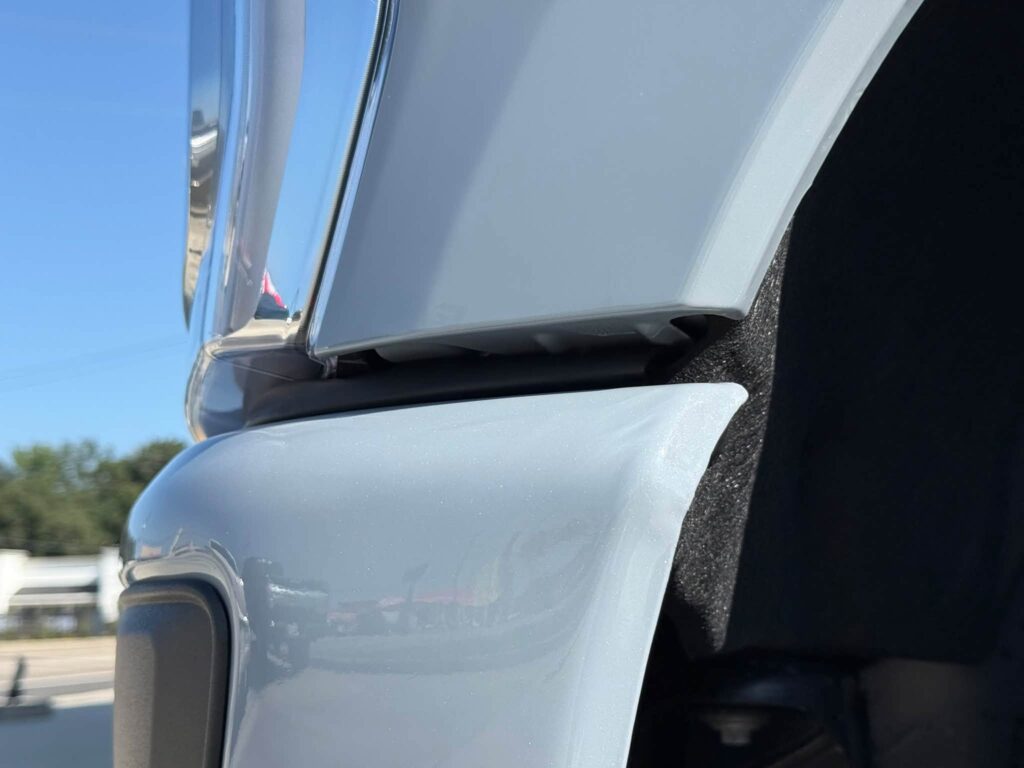
Where panel geometry and access allow, extending PPF around an edge can both increase coverage and make the film less noticeable.
But simply having extra film isn’t enough.
Corners need to be hugged and wrapped properly.
Too little material can leave an unnecessarily visible edge. Too much material underneath a corner can bunch together, creating an unnecessarily bulky finish and potentially compromising how cleanly the film sits.
On the F-350, the corners were carefully worked and wrapped underneath without leaving excessive film bunched up on the underside.
The objective is controlled coverage: enough material to create a secure, clean wrap without unnecessary excess.
These areas may rarely be noticed by the vehicle owner, but that’s part of the point.
The details you don’t immediately see often tell you the most about the quality of a PPF installation.
Little to No Contamination or Adhesive Lines
Take a close look across the finished film and another thing should stand out:
There is little to no visible contamination or adhesive lines beneath the PPF.
Achieving a clean installation starts long before the final squeegee pass.
PPF is transparent, which means anything trapped between the paint and the film can potentially remain visible afterward. Dust, fibers, debris, or other contaminants can compromise an otherwise beautiful installation.
That’s why proper surface preparation and a clean working environment matter so much.
The vehicle and individual surfaces need to be thoroughly prepared before installation, and cleanliness needs to be maintained throughout the process.
Technique matters as well.
Properly managing the film, installation solution, adhesive, surface energy, stretching, and squeegee technique helps the film settle onto the panel cleanly without unnecessary adhesive distortion or visible installation marks.
The goal isn’t simply to make the PPF stick.
The goal is to make it look like it isn’t there.
No Trapped Air or Moisture Left Behind
Installation solution is part of the PPF installation process, but the finished product shouldn’t be left with obvious pockets of air or moisture throughout the film.
This becomes particularly important around complex contours and recessed areas like the SUPER DUTY lettering on this truck.
During installation, we carefully worked the film into these areas and evacuated the air and moisture rather than simply bridging the film over the contour or cutting around it.
The finished result is film that conforms closely to the actual shape of the panel.
Again, it’s attention to details like this that separates simply covering a panel with PPF from properly installing it.
The Best PPF Installation Is the One You Barely Notice
When people compare paint protection film options, a lot of attention naturally goes toward the film itself.
That’s important. You want a quality product protecting your vehicle.
But even excellent film can only look as good as the installation underneath it.
That’s why we put so much emphasis on the process at Southern Tint & Detail Pros.
On this 2026 Ford F-350 Platinum, that meant removing appropriate trim instead of simply cutting around everything, combining modified hybrid patterns with bulk installation, extending and tucking film where appropriate, wrapping corners without bunching excess material, carefully laying film into the recessed SUPER DUTY hood lettering, and maintaining a clean installation with little to no visible contamination or adhesive lines.
It takes more time.
It requires more attention.
And many of the details are things the average person may never consciously notice.
That’s exactly how we want it.
When PPF is installed properly, the paint gets the protection while the vehicle’s original appearance remains the star of the show.
Protect Your Vehicle With PPF Installed the Right Way
Whether you’re protecting a brand-new truck like this Ford F-350 Platinum, a daily driver, a performance vehicle, or something you’ve wanted to keep pristine for years, the quality of your PPF installation matters.
At Southern Tint & Detail Pros, we approach paint protection film with one goal: maximum practical protection with an installation clean enough that you can forget the film is even there.
Quality film is important.
Quality installation is what makes the difference.